4.4 Editing groups
Using the Edit Groups option, you can add, rename, edit, and remove groups; you can also import an LDAP directory branch into your group structure.
-
From the People category, select Edit Groups.
You can also launch this workflow from the Group Management section of the More category in the MyID Operator Client. See the Using Group Management workflows section in the MyID Operator Client guide for details.

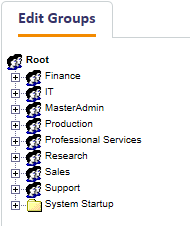
Existing groups are displayed in a tree structure, and can be expanded or collapsed by clicking the plus (+) or minus (-) signs to the left of their names.
Click a group name to select it.
-
Right-click the name of a selected group to display a menu. From here you can:
- Add a new group
- Move a group to a new location in the tree structure
- Rename a group
- Import an LDAP directory branch, choosing whether to:
- Import an Organizational Unit (OU) and its children
- Import just the children of an OU
- Remove a group, choosing whether to:
- Remove a group, moving any groups it contains and the users to a new group
- Remove the group and any groups it contains, moving just the users to a new group
- When you have made all the necessary changes, click Save.
4.4.1 Adding a new group
- Right-click the name of the group that you want to contain the new group.
-
Select Add, then New Group from the menu.
A new group is created, called New.
If the parent group is closed, you may not see the new group. Click the plus sign (+) sign next to the parent group to view it.
- Right-click the name of the group and select Rename Group from the menu.
- Select the existing name of the group and enter a new one.
- Click Save.
4.4.2 Moving a group
- Right-click the name of the group that you want to move.
- Select Move Group from the menu.
- Click the name of the group that you want to contain it.
- Click Save.
4.4.3 Renaming a group
- Right-click the name of the group that you want to rename.
- Select Rename Group from the menu.
- Highlight the existing name of the group and enter a new one.
- Click Save.
4.4.4 Importing an LDAP directory branch
- Right-click on the name of the group into which you want to import a branch from an LDAP directory.
- Select Import LDAP Branch from the menu.
-
Select one of the following options:
- OU and Children to import the group and all its contents
- Just Children to import just the contents of the group
-
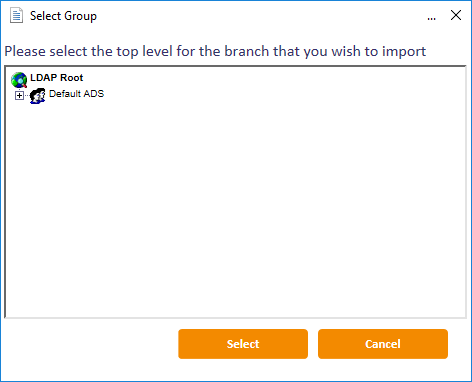
The Select Group box opens.

Locate and select the Organizational Unit (OU) that you want to import and click Select.
- Click Save.
4.4.5 Removing a group
- Right-click the name of the group you want to remove.
- Select Remove Group from the menu.
-
Select one of the following options:
- Remove Group, Move Sub-Groups and Users to delete the group but move any sub-groups and people to another group.
- Remove Group and Sub-Group, Move Users to delete the group and any sub-groups within it but move the people to another group.
- A message is prompts you to confirm that you want to delete the group. Click Yes to continue.
-
The Reparent Users box opens.
Click the name of the group into which you want to move any sub-groups and people, then click Select.
- Click Save.